From Saturday March 4th to Sunday March 12th my art is up at the Nasty Women
Amsterdam Exhibition.
This is the Amsterdam sister of Nasty Women NYC, a group exhibition that serves to
demonstrate solidarity among artists who identify with being a Nasty Woman in the face of
threats to roll back women’s rights, individual rights, and abortion rights. It also serves as
a fundraiser to support organizations defending these rights and to be a platform for
organization before the Trump Presidential Inauguration in January.
183 Artists from 27 countries of all ages, races, religions, sexual orientations have been so
generous to donate more than 240 artworks, well-known and lesser known artists from the
Netherlands and abroad. They want to make a statement, show solidarity and stand up for
equal rights for women, LGBTQ, for everybody. They use the valuable tools they know: art.
Together it’s an amazing fundraiser with artworks from € 1 to € 200. Hopefully all art will be
sold to raise money for She Decides (fund for girls and women in third world countries),
Women on Waves (providing abortion pills for women worldwide) and COC Amsterdam
(LGBTQ rights).
We hope you will join the opening reception on Saturday, March 4, 4-8 pm at:
Josilda da Conceição Gallery, Wormerveerstraat 14, Amsterdam.
Closing party: Sunday, March 12.
Exhibition runs March 4 – 12, 2017
Josilda da Conceição Gallery
Wormerveerstraat 15, 1013 JS Amsterdam
Opening Reception: March 4 from 4 – 8 PM
Opening hours: March 5, 9, 10, 11, 12 from 2 – 5 PM

- Gegevens
- Hits: 5513
During my ‘15 Lino’s in 30 Days’ challenge I got a few questions about my process.
For instance how I transfer my drawing to the lino. So I thought it would be fun to write a
blogpost about it. This is my way of working and by no means I want to suggest it is the
proper or only way to cut a lino.
1) First I make a quick sketch with my trusty Faber-Castell Grip Plus 0.7 pencil. I bought this
pencil because of my old hand-/ thumb injury. Because of its broadness it has a nice grip.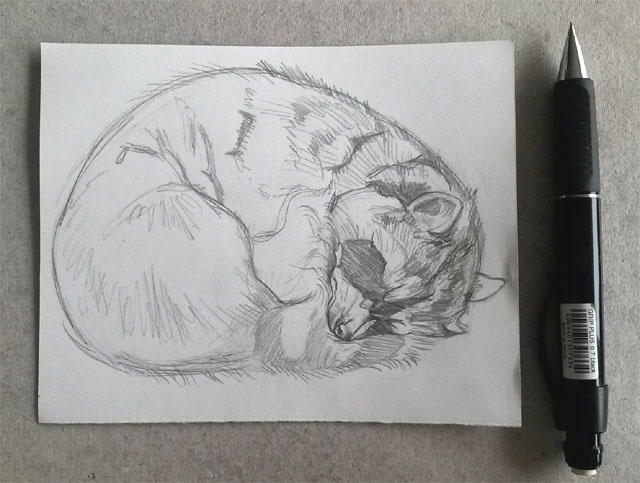
2) Using that same pencil I make a very global copy on tracing paper.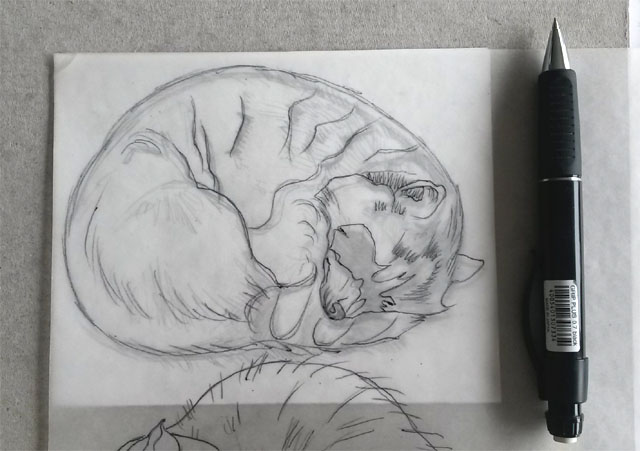
3) Next I take the piece of lino I want to use and tape the tracing paper on top of it. To transfer
the drawing from the tracing paper to the lino I use black carbon paper (the kind that’s for
typewriting, somehow it works better than the blue kind which is meant for handwriting).
I use a Bic pen to trace the drawing.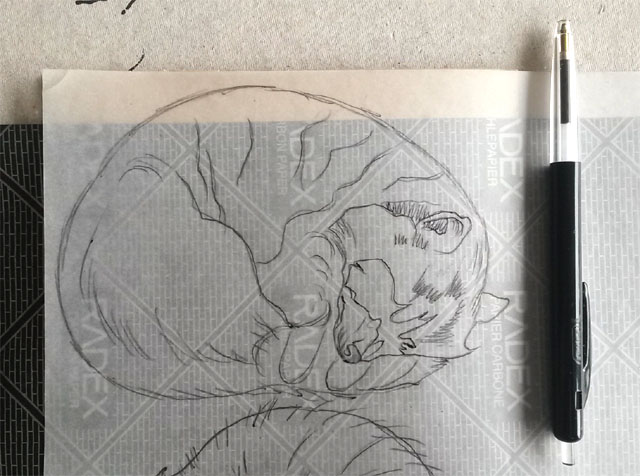
4) When the tracing is done I use a Stanger CD/ DVD marker to make a detailed drawing on
the lino using the carbon line as a guidance. The marker takes to the lino and doesn’t get
wiped off easily.
5) As you can see compared to the first sketch the drawing on the lino is much more detailed.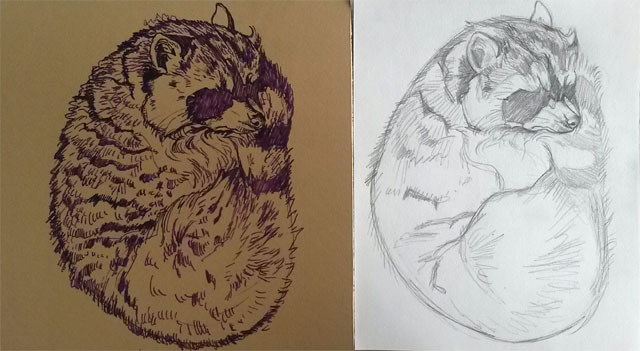
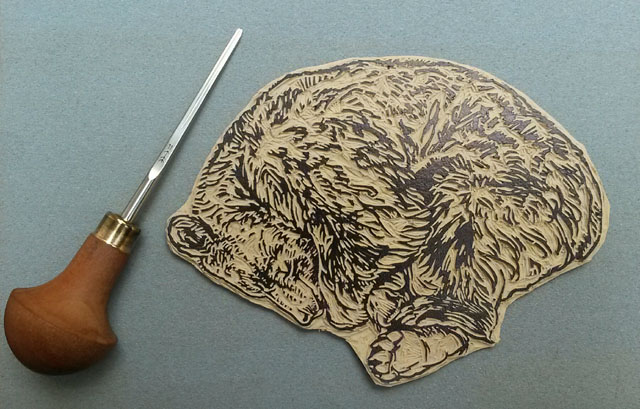
6) Time to cut! For my birthday I got this L 11/1 gouge by Pfeil. It’s U-shaped and makes very
nice fine lines. I used this gouge during the entire ‘15 Lino’s in 30 Days’ challenge.
For bigger surfaces I used my regular Abig lino cutting toolset which also worked perfectly.
When you look at this picture you still see the CD/ DVD marker markings but to get a really
clear picture I use another marker.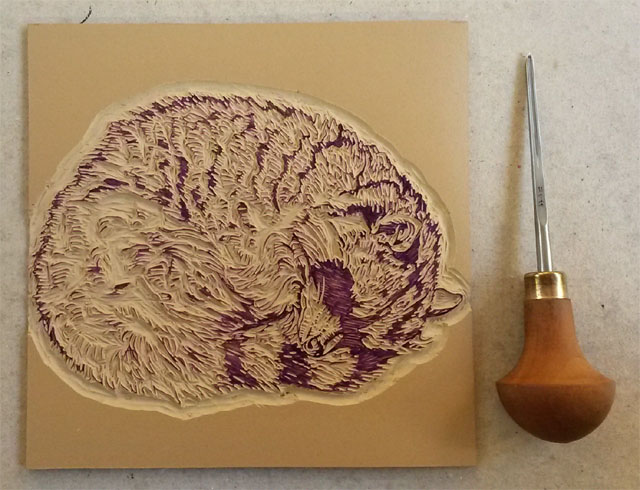
7) Here I used the Staedtler permanent Lumocolor marker to have a more clear image.
Having finished this this is the part where I squint my eyes and have an image of what the
print is going to look like!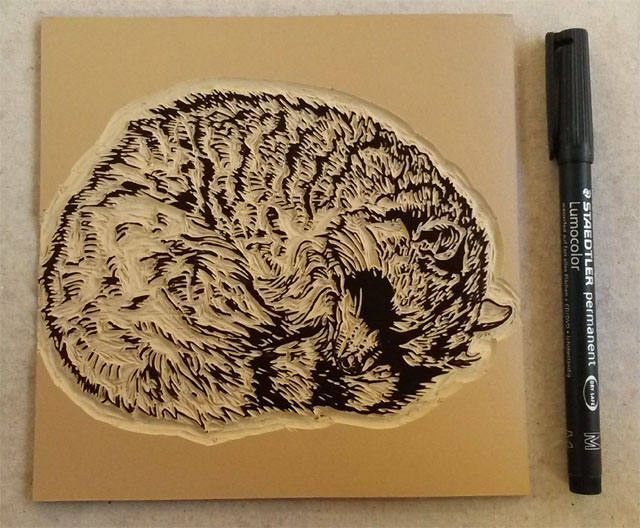
8) Ready to print!!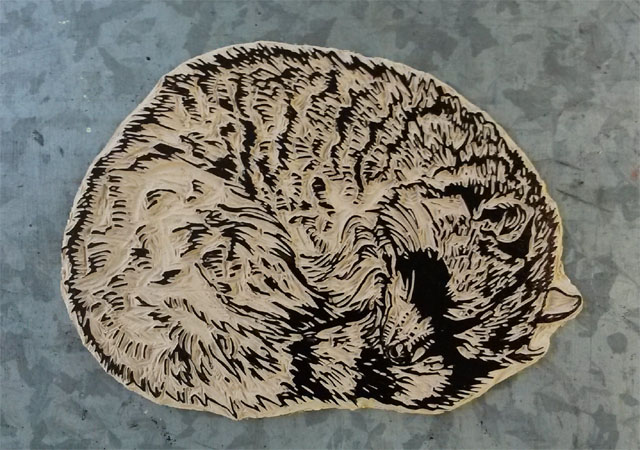
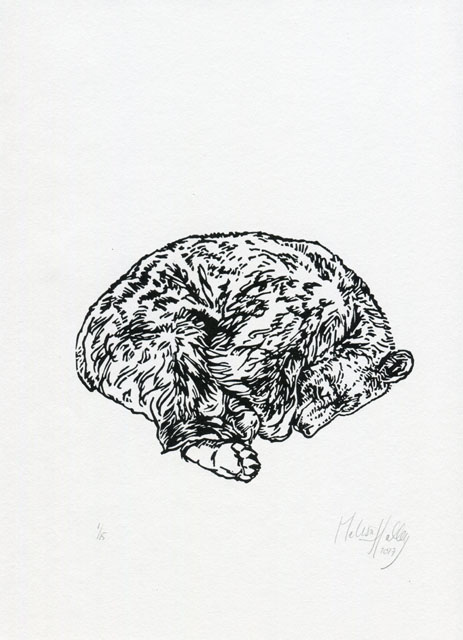
After the first test-print I got the sense I missed something in the face and added a little line to
suggest a sleepy raccoon eye. You can find the end result here!
🍃🍂
- Gegevens
- Hits: 7988
This was the 3rd time I participated in Leslie Saeta’s ‘30 Paintings in 30 Days’ challenge
and it was the hardest and most challenging of all.
For the longest of time I’ve been trying to start making lino’s again but every time something
would come up or I would simply decide to do something else.
In the past I’ve done lots of etchings and lino’s. In 2008 I injured my thumb and wrist
by working too hard on a commissioned etching. I thought that if I took some time off,
gave my hand a rest, the pain would disappear like it did before but it didn’t.
It turned out to be an inflamed muscle or tendon, the doctors weren’t sure. To my
frustration I didn’t get the proper help and ended up not being able to make art with my
drawing hand for a year.
First I switched to my left hand and after a while back to my right and to inks. It took years
before I could use pencils and pastels again without hurting. Etching and lino are physically
very demanding so getting back in the saddle of making linocuts was a biggie.
That’s why I decided to turn Leslie Saeta’s ‘30 Paintings in 30 Days’ challenge into the
'15 Lino’s in 30 Days' challenge. Cut one day, print the next.
I knew this was going to be a difficult challenge and wasn’t sure if I would be able to finish it
because of my old injury. But I did!
It is a huge relief to know I’m able to do lino’s again, maybe even drypoint etchings! I just
need to set some rules for myself. Important is to take regular, small brakes.
So after 30 days of hard work I ended up with 15 new lino’s in one month’s time, which is a lot!
I ended up with some callus on my fingertips and (only) 4 cuts in my fingers.
Most importantly I ended up with the knowledge I can do lino’s again and I’m able to
take on big projects!!
Edit: You can find my Sleeping Animals series here 😴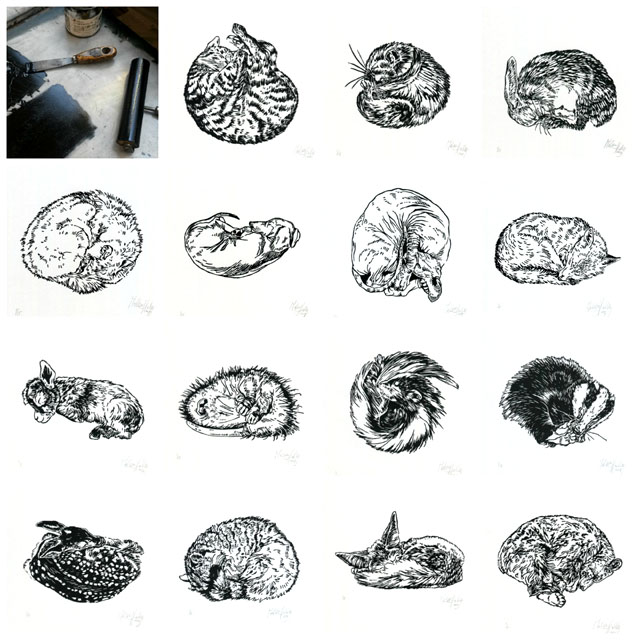
- Gegevens
- Hits: 17452
Finished! All 15 linocuts and their prints are done!
I really wanted to end the challenge with a hibernating brown bear. I’m glad how it
turned out. This one was a lot of work, the face was so lovely, I needed to get that!
Cautious not to cut away too much I think it took me over an hour to do just the head
because the facial expression is so delicate.
Tomorrow I’ll write more about what this challenge has offered me.
Edit: You can find my Sleeping Animals series here 😴
Sleepy Bear, Linocut, 30x24 cm, 2017
- Gegevens
- Hits: 13863
When you think hibernation, you think bear!
Edit: You can find my Sleeping Animals series here 😴
- Gegevens
- Hits: 13121
Pagina 14 van 44